
 Fondofold-Bag


From Sketch to Shelf: The Journey of a Quilted Makeup Bag
The first email usually arrives with a photo attached. It is a quilted pouch on a shelf in a beauty hall somewhere, taken on a phone at an angle, and the message underneath says: can you make this, but 20 cm wide, in our pink, with our logo on the puller.
On paper it is one of the simplest bags in our catalogue. Three layers of material, a zip, a label. In production, each of those three layers has an opinion, and most of the work between sketch and shelf is about getting them to agree.
This is what actually happens in the eight weeks between that email and a carton arriving at a warehouse.
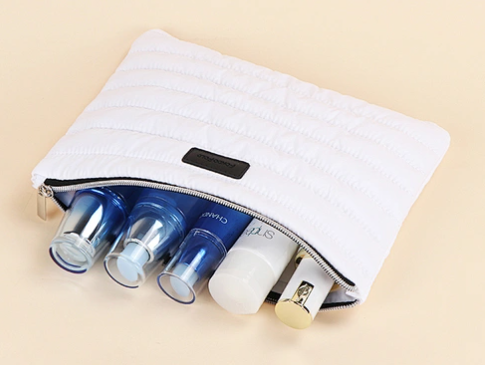
What the brief really needs to contain
Most first briefs give length, width, colour and a reference photo. That is enough to quote, not enough to sample.
Four things decide whether a quilted pouch looks premium on shelf or looks like a giveaway: the quilting pattern and its stitch pitch, the wadding thickness, the gusset depth, and the edge finish. A pouch with a 4 cm gusset stands upright in a display and photographs well. The same pouch with a 1 cm gusset lies flat and reads as a pencil case. Buyers often leave this number out because the reference photo does not show it.
The rest of the brief is more familiar: shell fabric, lining, zip type, puller, logo method, packing, and the date the goods need to leave the factory, which is usually earlier than the date the buyer first says.
Choosing the three layers
The shell. Quilting is a texture, and texture only shows on fabric that has some softness. RPET twill in 210D or 300D is the workhorse: it takes dye evenly, holds a quilted diamond without shining, and satisfies the recycled-content story most beauty brands now need. Cotton canvas at 12 oz gives a matte, natural look but quilts flat, because the fabric is stiff and the wadding has nowhere to puff. Velvet and brushed polyester give the deepest quilt definition and the highest return rate, since pile catches every fingerprint in the shop.
The wadding. Two millimetre polyester needle-punch is the default and covers perhaps eighty percent of orders. Three millimetres gives the puffy look that photographs best on e-commerce, at the cost of bulk at the seams; the sewing room has to clip and grade the corners or the pouch will not turn cleanly. Five millimetre wadding needs a wider zip tape and a larger seam allowance, and on a small pouch it starts to look like a cushion rather than a cosmetic bag.
The lining. 210T polyester taffeta is standard and inexpensive. Recycled 190T is the version to specify if the outer is RPET and the brand wants a consistent claim. PVC lining gets requested for powder spills and wipe-clean use, but it complicates the recycling message, and we usually ask the buyer which of the two matters more before we quote.
Stitched quilting or ultrasonic
Both are quilting. They are not the same product.
Stitched quilting uses thread, usually a fine polyester, at a pitch of three to five stitches per centimetre. It is durable, it is what most people picture when they hear the word quilted, and it tolerates complex patterns: diamonds, chevrons, channel lines, a scalloped grid. The risk is drift. On a run of two thousand pieces, the top feed and the wadding can shift by two or three millimetres across a panel, and a diamond pattern that lined up on the sample will not line up on piece one thousand. Good factories run a first-off check every few hundred panels; the rest run the batch and hope.
Ultrasonic quilting welds the layers with heat and no thread. It is faster, cheaper above roughly three thousand pieces, and the edges come out sharp, which suits a modern, architectural look. Patterns are limited to straight lines and simple curves, because the horn has to travel. It also leaves a faint sheen along the weld line, which is invisible on light colours and quite visible on black velvet. If a buyer sends us a photo of a dark quilted pouch and asks for ultrasonic, we send back a photo of the sheen before we send a price.
Where the sample goes wrong
Quilting shrinks the panel. Depending on pattern density and wadding, a quilted panel loses three to five percent of its area, and it loses it unevenly. A pouch specified at 20 by 12 cm can come back at 19.2 by 11.6 if the pattern was cut to nominal size. Every factory knows this. The ones that plan for it cut oversized and trim after quilting; the ones that do not will tell the buyer the tolerance is plus or minus five millimetres and hope nobody measures.
Three other problems show up in the first sample more often than any others:
- A wavy zip. The quilted front panel is thicker than the back panel, so the zip tape is fed two materials of different bulk. Without a compensating foot and a slightly slower feed, the zip ripples, and no amount of pressing fixes it permanently.
- Puckered corners. A diamond pattern that runs into a corner leaves four layers of quilting to turn inside one seam. Either the pattern stops short of the seam line, or the corner is clipped and graded by hand.
- Shade difference between panels. The front is quilted, the back is plain, both from the same dye lot, and they read as two different colours under shop lighting because the quilting compresses the pile and changes how the surface reflects light. On velvet this is unavoidable and should be shown to the buyer in the sample, not discovered at delivery.
The floor: cut, quilt, cut again
Production runs in a sequence that surprises most first-time buyers. The fabric is spread and cut oversized, in layers of twenty to forty, then sent to quilting as flat panels. Only after quilting is the panel cut to its final pattern. Cutting first and quilting second is faster and produces wavy edges, which is why the cheap version of this bag always looks slightly out of shape.
Quilting itself is a single machine pass per panel, or several if the pattern runs in two directions. Channel quilting, the vertical-line pattern that has been on shelf for three seasons now, is the fastest: one direction, no pattern matching at the seams. Diamond patterns take roughly twice the machine time and need the panels marked or laser-guided, which is where the cost difference between a nine-dollar pouch and a fourteen-dollar pouch actually sits.
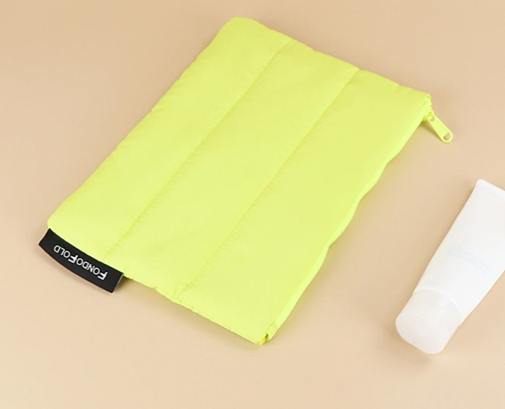
Sewing, edges and the small hardware
The front and back panels are joined to the gusset, the zip is set, the lining is bagged out, and the whole thing is turned through a gap and topstitched. On a good pouch the topstitch is 2 mm from the edge and dead parallel on both sides of the zip. On a rushed one it wanders, and that single line is what a buyer's eye catches first.
Edge treatment separates the price tiers more than the fabric does. A bound edge in self-fabric is the baseline. A piped edge, with a cord inside a matching or contrasting tape, adds cost and adds the impression of a structured, giftable product. A raw edge with overlock is for promotional volume and should never be offered to a beauty brand.
Hardware is where brands put their name. Three options in order of cost: a woven label folded into the side seam, a debossed metal plate riveted to the front, or a custom zip puller in moulded plastic or zinc alloy. Printing directly onto a quilted surface is possible but uneven; if the brand wants a printed logo, we print it on a flat patch and sew the patch on, which also gives the pouch a second visual element.
What gets checked before the carton is sealed
A pre-shipment inspection on a quilted pouch looks at measurements against the approved sample, at plus or minus five millimetres, and at the quilt pattern alignment where panels meet. Seams are pulled by hand at the gusset corners, which is where a bag fails first. Zips are cycled; five hundred open-and-close cycles is the usual request from European retailers, and a nylon coil will pass while a cheap moulded zip will start catching around three hundred.
Colour is checked under D65 lighting against the approved lab dip, not under the factory's fluorescent tubes, because a pouch that matches at two in the afternoon can look a shade off in a shop window. Metal detection is standard for anything a child might handle, and some clients now ask for a needle-detection pass across the whole batch.
Timing, packing, and the date that matters
A realistic schedule for a custom quilted makeup bag:
- Sampling, including one round of revision: 7 to 10 working days
- Bulk production for 3,000 to 5,000 pieces: 25 to 35 days
- Pre-shipment inspection and documentation: 2 to 3 days
Packing is unglamorous and frequently gets specified too late. One piece per polybag with a desiccant, one hundred per export carton, carton weight under fifteen kilograms so a warehouse picker in Rotterdam can lift it alone. If the pouch ships with a hangtag, the tag has to be attached before packing, and that step adds two days.
Five questions to ask before you place the order
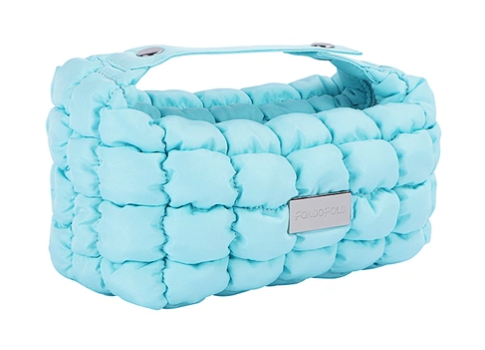
A supplier who answers all five without checking with someone else is a supplier who has made this bag before.
A quilted makeup bag is one of the simplest things we make and one of the easiest to get wrong. The difference between the version that sells at forty dollars and the version that ends up in a discount bin is rarely the fabric. It is three millimetres of wadding, one line of topstitching, and whether anyone measured the panel after it came off the quilting machine.
If you have a sketch, a reference photo, or a shelf sample you want to improve on, send it over. We will come back with material options, a quilting recommendation and a cost breakdown within two working days.


